Wednesday, December 28, 2011

Daybedlam

Once again I am calling on the Bloggers on High for advice, lest I lose my little mind!
 Another local Craigslist find.  $160!  It needes to be reupholstered, however.  That's where you come in! The photo is from Craigslist. The sofa is currently in my driveway.  I am hoping the fresh, cool air will remove the smell of Fabreeze!

 It doesn't actually need to be reupholstered.  The fabric is lovely and of high quality but I prefer something different.  I'm sure you understand! The cushions are down filled and the piece is very clean.  I would like to have it reglued just in case. Furthermore, it is actually a sofa, not a daybed...but I couldn't come up with any decent sofa puns.

The craziness began when I researched upholstery options for daybeds...
This is similar in shape to mine...too light colored for everyday use...

Too yellow...but I adore the chandelier!  The woman had one just like it for sale!

Love this color!  Mohair maybe?

I think I will paint the frame similar to this...


Too...something

Same here...

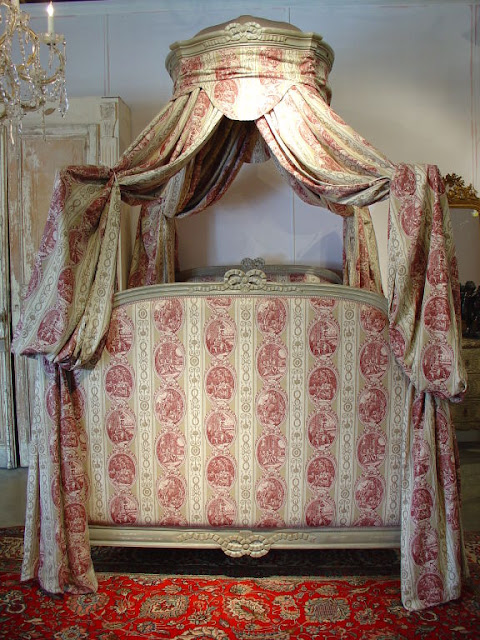
Oooh!  Toile!

Maybe a nice Bosporus toile that hides stains?  With a grey-green finish on the wood?

This finish would be perfect!  I think?


This is going in Gracie's playroom, where we also keep a television set.  Here are some other items in the room to help you help me!
Not a very good photo of the handpainted woodland chest.  This is the Craigslist photo.  I just realized I don't have any photos of the playroom...probably because it is so cluttered!

Don't let the photo fool you, this armoire is gigantic!

French puppet theater...

Dollhouse...last year's present from Santa!  Craigslist find for $100!  See the details here!


There you have it! 
Can you help?


Friday, December 23, 2011

Blessings of the Season

Dearest Friends,

May the many Blessings of the Season drift down onto your shoulders, softly and gently, like freshly falling snow!
I have been blessed by each and every one of you and I look forward to following your stories, your interests, your creativity and your lives in the years to come!


From Wikipedia:

*Snowflakes are conglomerations of frozen ice crystals which fall through the Earth's atmosphere. They begin as snow crystals which develop when microscopic supercooled cloud droplets freeze. Snowflakes come in a variety of sizes and shapes. Complex shapes emerge as the flake moves through differing temperature and humidity regimes. Individual snowflakes are nearly unique in structure.


Here are a couple of photographs of actual snowflakes under a microscope! Each breathtaking and unique, just like my friends! The Good Lord knows what He's doing!


Happiest of Holidays To You!

xoxo
Andie

Saturday, November 19, 2011

Angel Wing Tutorial

I have always loved the look of antique, carved and gilded angel wings.  I have photos from magazines that are over 15 years old, even before they became trendy!


The cost was prohibitive, to say the least.  The price of large antique wings hovered near $2,000 and up...waaaaay up!
While perusing ebay a fews years back I entered large gold wings into the search engine...finally!  A pair of wings I could afford...with a hitch...
I used a pair of adult size plastic angel wings.  I purchased mine from Sun Dog Imports on ebay several years ago for about $15.  Each is 33" tall x 13" wide.  They are very, very lightweight plastic.  There was no way to hang them.  Even if could hang them they would have gone all cattywampus because they are so flimsy.  I decided to use cotton quilt batting to line the insides. It made the wings more sturdy and opaque. I layered the batting with Tacky Glue until I felt like they were sturdy enough.  Be certain to line every inch!  I used lots of glue!  Almost two 16oz bottles! What I really like about these wings is the convex shape.  I considered using them as a mold for papier mache but decided against it for now.  I have another (white) pair in the basement that I might attempt use in that fashion.
*Please note the Kravet Starburst fabric I recently purched from a lovely woman named Edwina on Craigslist.  Her house is so beautiful I didn't want to leave!


When the glue dried...I gave it two days, I secured wooden dowels with glue.  You can see that I made a "T" shape near the top and glued a shorter dowel on the wing's edge. (I hope this makes sense!) This helped make them much more sturdy.


When the glue holding the dowels in place dried I turned the wing over and gave it a thick coat of Annie Sloan Dark Wax.  I allowed the wax to dry, then used picture wire (wrapped around the "T" of the dowels) to form a hanging loop.


The wings are still very lightweight but now they are sturdy.


If I wasn't clear enough just send an email and I will try to clarify my instructions.  
I am currently on the lookout for a cardboard refrigerator box to make a ginormous pair of angel wings!


Wednesday, November 16, 2011

How NOT to Make Moss Spheres

This is why I never do tutorials. I start to get cocky and then something inevitably goes South.  Today is no exception. I muddled through, however. Lessons learned. Lessons I can now pass on for your entertainment and scholarship!

Let's start with the basics, supplies:
I have a pair of two foot tall urns flanking the fireplace that needed a bit of color. I decided that moss covered spheres would be perfect.  I purchased Reindeer Moss at Hobby Lobby.  The styrofoam craft spheres were a bit large for this project and they cost $18.99 each! In the past I made spheres from basketballs but I was impatient and I could not find any this evening.  I opted for vinyl bouncy balls.   More on that later. 
I'll bet you're wondering why I have toilet paper here?  I don't blame you. After searching the house for something to fill the urn so the sphere doesn't move around and also so it is jutting out of the urn at the perfect height, this was my solution.  Plus, there is always something a bit awkward and off about every one of my DIY endeavors. Why should this be any different?  It also came in handy as a pedestal on which to balance the balls while I painted them.
I have 8,792 craft components in my basement.  You'd think ONE of them would work with this project so I would not be forced to use toilet paper.
Such is my destiny.

I painted the balls a moss green and waited for them to dry.
After the balls dried I began hot gluing the moss on them, using the toilet paper roll as a stand.  Then it happened.  The ball popped!  Why?  Because I am an idiot.  That's why.
Even a child knows that applying extreme heat to vinyl will destroy it.
Handsome Husband probably knew it too.
But he didn't mention it to me.
He just watched...and said nothing.
A conspiracy?
You decide.

Not to be deterred, I cut a hole in the bottom of the ball and stuffed it with old plastic grocery bags and taped it shut.  Sounds simple enough but it really was a pain in the keister! The vinyl is very thin and it kept ripping! Gah!  Next time I will find basketballs or wait for the styrofoam craft balls to go on sale. 

If there is a next time.


Before moss spheres.


After. Even with all the challenges it only took 30 minutes for both spheres.
I just pray no one ever looks under the spheres!

I have a favor to ask of you.
If I die will you please come to my house and hide the toilet paper rolls so their existence cannot impugn my character and cause people to avoid my funeral?
I've always wanted a big funeral.  This could ruin my chances. 

Total cost:
Three Bags Reindeer Moss..$7.50
Two Bouncy Balls...             $3.00
Can of Spray Paint...             $4.00
_____________________________

Total...                                    $14.50


I priced these online for $110 and up, each!

Reindeer moss has such a wonderful scent.  I think that's how I remained cheerful through this whole debacle!

xo

Andie


Early Birthday Present!

Meet Jenny!  She is from the same shelter as  our sweet Duchess,  the Will County Humane Society.  Jenny is 19 years old.  I could not get her little face out of my head since I was at the shelter to get Duchess.  It made me so sad to think about her.  She needed warm laps, snuggles and sunlight streaming through windows and puddling in warm patches on the floor... The Humane Society really cares about its wards. The staff and volunteers are such a lovely group of people.  I am honored that they allowed me to bring her into our home.  They even waived the adoption fee!  

She spent the night in Duchess' old room!  It's actually the guest bathroom.  I slept on the floor next to her crate.  At first she was a bit timid but she slept on my tummy for about four hours!  This photo was taken with my cell phone.  Isn't she just lovely?!  She is currently wrapped up like a taco in a down comforter!
Tomorrow we go to the vet.  She is so skinny! Please send her all your prayers and well wishes!
Here she is in a photo from the Humane Society.  She has been there a long, long time.
I hope she likes it here with us!  I ordered her Christmas stocking last week, so it should be here in plenty of time to fill for Christmas!

Doesn't my husband ROCK?!  I mean, seriously ROCK!? 

Happy Birthday to MEEEEE!


Sunday, November 13, 2011

The Buffet...An Explanation...

I can explain.  I posted a photo of a buffet from Craigslist a while back.  I asked for your opinion on how to paint it. The photo was actually the Craigslist photo.  I had not seen the buffet in person until it was delivered.  It was lower than I had envisioned and the wreath appliques turned out to be a bit more feminine than I realized...


It is very long.  Six feet!  I liked that!

The wreath, although lovely, was not my style.

I tried removing the bow...eh, no.  The mirror that I am hanging over the buffet is fairly ornate.  I did not want this to compete.

I decided that I would still change out the puny pulls with these French style backplate pulls.


I am always inspired by the designs of the great Tara Shaw.  This buffet is no exception!


I decided on a simple paint scheme and color...one that pulls from the other pieces on the room, including the recently painted buffet deux corps.  These photos were taken at night.  The detail is lost. I will take more in natural light in the morning!  I was too excited to show you!


 Annie Sloan Old White, followed by Clear Wax, then a mixture of 3 parts Clear Wax to 1 part Dark Wax.


After the wax mixture was applied I sanded and gouged the paint a bit to give it the appearance of an antique.  I then buffed it.  I may apply Annie Sloan Old Ochre to the trim, as in the Tara Shaw buffet.


This piece took 2 hours from start to finish...once I made up my mind!


I promise better "after" photos in the daylight!


That's my story and I'm sticking to it!

xo
Andie

Earlier this year, I purchased this Lee Jofa, Allegorie A L'Amour wallpaper from Richard, at My Old Historic House.  I hope I have enough for this room!  Stop by his blog and see how it looks in his stunning Victorian home!  Tell him I said hello!

I am so excited to see this coming together!


I Tweak, Therefore I Am

With apologies to Descartes, I would like to share an addition to my latest project, the buffet deux corps...


The piece needed something to "marry" the top to the bottom.  A kind blogger suggested I paint the bonnet, between the dentil and rope molding, the same Annie Sloan French Linen as the body.
I did not do this for two reasons.
1).  I was afraid of it looking too stripey and...
         2).  I used up all  of my Annie Sloan French Linen! 


I looked through my collection of antique ormolu and newer wood appliques.  Nothing seemed to work. I came upon a cherub door knocker that I had intended to use as a towel holder but it was too small.  I aslo had a crown that was formerly a coat hook from Hobby Lobby.
I painted each with Annie Sloan Old White, Clear and then Dark Wax.

The Dining Room is semi-formal so I think this works a bit more than just the plain cabinet.

What do you think?


Friday, November 11, 2011

How I saved $12,000 Or More!

 I have always wanted a buffet deux corps.  However, my budget had other plans.  I contented myself with merely looking at photos...


This is currently on 1st Dibs for $22,000!


Buffet Deux Corps, Christies.  Sold.  No price listed...but it's Christies!  Out of my league!


Another one from Christies


This one is from Cote de Texas


I love the painted finish on this reproduction biblioteque from Tara Shaw Maison.  For sale at Layla Grace for $12,163.

Why do I torture myself?


I found this armoire on Craigslist!  The plot thickens! This piece is heavy...very, very heavy!  


A little wood filler in the knots and we are on our way!  While I was at it I filled in the shells at the top and bottom of each door.  They screamed 1990's to me!


After two coats of Annie Sloan Old White


Two more coats of Annie Sloan French Linen


Followed by Clear Wax, then Dark Wax.  Buffing and sanding this was a workout!


I am on the lookout for a slab of wood that can be placed between the top and bottom pieces to act as a serving area...

My new best friend!  A little on a cloth helps remove concentrated areas of Dark Wax in seconds!  I discovered this quite by accident when I was cleaning the floor after I was done painting!


Detail of dentil and rope molding on bonnet..


Before and After


Next to Tara Shaw biblioteque...


The first photograph was taken with the camera flash on and the second in natural light. See the big difference?


There you have it!  My dining room should be complete by Thanksgiving!  No.  I haven't forgotten about the buffet! 

This project took 7 1/2 hours from start to finish.  I used a blow dryer to speed the drying process.  The blow dryer also comes in handy to melt the Dark Wax if you need more "working" time.


Only 18 more pieces of furniture to paint and I'm done!

xo
Andie

I am sharing this with...

Between Naps On the Porch, Metamorphosis Monday
Shades of Amber, Chalk Paint Link Party
Sherry, at No Minimalist Here, Open House Party

LinkWithin

Related Posts Plugin for WordPress, Blogger...